
4.6
Owner's of the Vivitar Camcorder DVR 850W gave it a score of 4.6 out of 5. Here's how the scores stacked up:


32
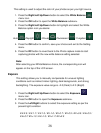
7. Press the OK button to save the date and time you selected and exit to
the Setting menu.
8. Press the DC button to revert back to the Photo capture mode.
9. Press the DC Shutter button to capture photos with date and time
stamps appearing on the photos when viewing the photos in Playback
mode or when downloaded to the computer.
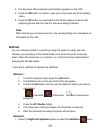
Setup Mode
The DVR setup mode is independent of the video and photo modes
and can be accessed from either the DV video menu or the DC camera
menu.
See the description of the Setup mode as explained at the end of the Video
Setting options section of this manual.
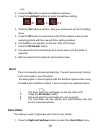
Playback mode
You can playback the videos on your camcorder or attach the TV In cable to
watch them on your TV screen.
1. After you open the LCD panel and power on your camcorder, press the
Playback mode button situated above the Power On button on the
inside wall of the camcorder.
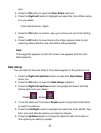
2. The Playback screen will appear with the Playback icon appearing
on the top right corner of the screen.
3. The Playback mode will appear on the LCD as a 2 X 2 matrix of image
thumbnails.
4. Press the Left/Right/Up/Down buttons to toggle through and select the
images you wish to view.
5. Photos will appear with a photo icon and Videos will appear with a video
icon on the top left corner of the thumbnails.


Find Your Products By Category
Please Login
