
4.6
Owner's of the Vivitar Camcorder DVR 850W gave it a score of 4.6 out of 5. Here's how the scores stacked up:
38
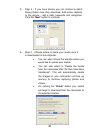
1. Plug one end of the provided USB cable into the USB slot on the back of
your camcorder.
2. Plug the other end of the USB cable into a USB port on your computer.
3. Turn your camcorder on.
4. Make sure your camcorder is in MSDC (Mass Storage) mode
5. Be sure to wait until the camcorder is recognized by your computer.
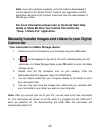
Important: We recommend not opening the software until you see the “Your
new hardware is installed and ready to use” pop-up box on the taskbar. The
camcorder may not function properly if you do not see this message before
you open your application
.
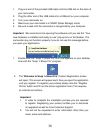
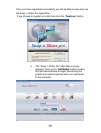
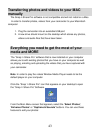
1. Double-click the “Snap ‘n Share Pro” icon that appears on your desktop
to launch the “Snap ‘n Share Pro” program.
2. The “Welcome to Snap ‘n Share Pro” Product Registration screen
will open. This screen will appear each time you open the application
until you register. To register your product please click the “Register
Online” button and fill out the online registration form (This requires
an internet connection).
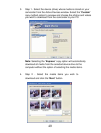
Important:
1. In order to complete the installation process you are required
to register. Registering your product entitles you to discounts
on upgrades as well as Free Customer Support.
2. You will not be requested to enter information other than you
name, email and address.


Find Your Products By Category
Please Login
