
4.1
Owner's of the Whirlpool Convection Oven GH7208XR gave it a score of 4.1 out of 5. Here's how the scores stacked up:

20
Cooking in Stages (or steps)
Manual cooking may be done in stages (or steps), up to 4 stages
total. The first stage may be programmed using any of the
manual controls. The stages may be reviewed at any time during
programming and/or cooking by touching “Review Steps” on the
touch screen.
Convection cooking cannot be done in stages.
NOTE: Manual Defrost can be programmed only as the 1st stage,
and is not available for subsequent stage programming.
To Cook in Stages:
1. Follow steps 1-3 in “Microwave Time/Power Cooking,”
or
follow steps 1-3 in “Time/Temp/Power Cooking.”
2. Touch “Add A Step” on the touch screen.
3. Select cook method, and follow screen prompts to program
the next stage.
4. Repeat steps 2 and 3 to program each additional stage.
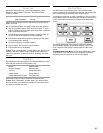
5. Touch “Start” on the touch screen, or START control.
The display will show the cycling stage’s cook time, cooking
power and/or temperature, and will count down each stage in
turn.
During the countdown, cook time and/or cooking power for
the cycling stage may be changed by touching “Adjust
Settings” on the touch screen, and following the prompts.
Each stage will immediately follow the previous stage, and
between cycle tones will sound when each new stage begins.
When the cycle ends, the end-of-cycle tones will sound,
followed by reminder tones.
6. Touch CANCEL control or open the door to stop reminder
tones. The display will return to the Main Menu after CANCEL
control is touched.
PROGRAMMED COOKING
Convection Cooking
During convection cycles, the convection element heats the air in
the oven cavity, and the convection fan circulates the hot air. The
constantly moving air surrounds the food to heat the outer
portion quickly.
See “Food Type Chart” for automatic convection cycles (Bake or
Roast).
Convection cooking may also be done manually. Use convection
cooking for items such as pies, breads, cookies, cakes and pizza.
See “Manual Cooking” section for instructions.
Manual convection cooking may be used to proof bread. See
“Raising (Proofing) Bread” section for instructions.
NOTES:
■ Use the provided convection rack.
■ Do not cover the turntable or convection rack with foil, as it
interferes with the circulation of hot air.
■ Do not use light plastic containers, plastic wrap or paper
products. All ovenproof cookware or metal utensils can be
used in convection cooking. (Round pizza pans are excellent
cooking utensils for many convection-only items.) Metal
utensils cannot be used in microwave or combination
cooking.
■ No special techniques are needed to adapt standard oven
recipes to convection cooking, although some cooking times
might need to be shortened, and some temperatures
adjusted.
■ This oven may be preheated in the same way that a standard
oven is preheated. (Most recipes for baked goods call for
preheating.)
Combination Cooking
Combination cooking uses microwaves in addition to the
convection system to cook or roast foods more quickly than with
convection alone.
Combination cooking may also be done manually. Use
combination cooking for items such as roasts, meat loaf,
lasagna, casseroles and whole chicken. See “Time/Temp/Power
Cooking” or “Convect Time/Temp” sections for instructions.
NOTES:
■ Do not use metal cookware or utensils during combination
cooking.
■ Meats may be roasted directly on the convection rack. Use
the Sizzle Pan to catch drippings.
■ Less tender cuts of beef can be roasted and tenderized using
oven cooking bags.
■ Check for doneness after the cycle has ended. If the food is
not completely done, let it stand in the oven for a few minutes
to finish cooking.
■ During any automatic or manual combination cycle, no more
than 30% microwave power is used.
Sensor Cooking
Some automatic cycles are sensor cycles. See “Cook Method
Chart.” No amounts need to be entered. A sensor in the oven
detects humidity released from the food as it heats, and adjusts
the cook time accordingly. The progress bar appears during
sensing (see “Progress Bar” section).
Many sensor cycles require the covering of foods. The provided
steamer vessel has a loose-fitting lid, which allows enough steam
to escape to be detected by the sensor. When covering foods
with plastic wrap, be sure to leave a large enough vent opening to
allow the steam to escape. If the door is opened during a sensor
cycle, sensing will stop and the program will be canceled.
NOTES:
■ The oven should be plugged in for at least 2 minutes.
■ The oven cavity and the exterior of the cooking container
should be dry.
■ The room temperature should not exceed 95°F (35°C).
■ For optimal performance, wait at least 30 minutes after
convection cooking or grill cooking before sensor cooking.


Find Your Products By Category
Please Login
