
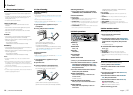
5.0
Owner's of the Kenwood Car Stereo System Kenwood Car Stereo System gave it a score of 5.0 out of 5. Here's how the scores stacked up:

8
|
KDC-X797/ KDC-BT755HD
English
|
9
2. GETTING STARTED
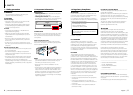
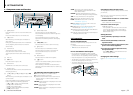
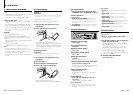
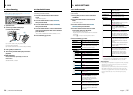
2.1 Component names and functions
3 4 5
679 810
12
1113
1 2
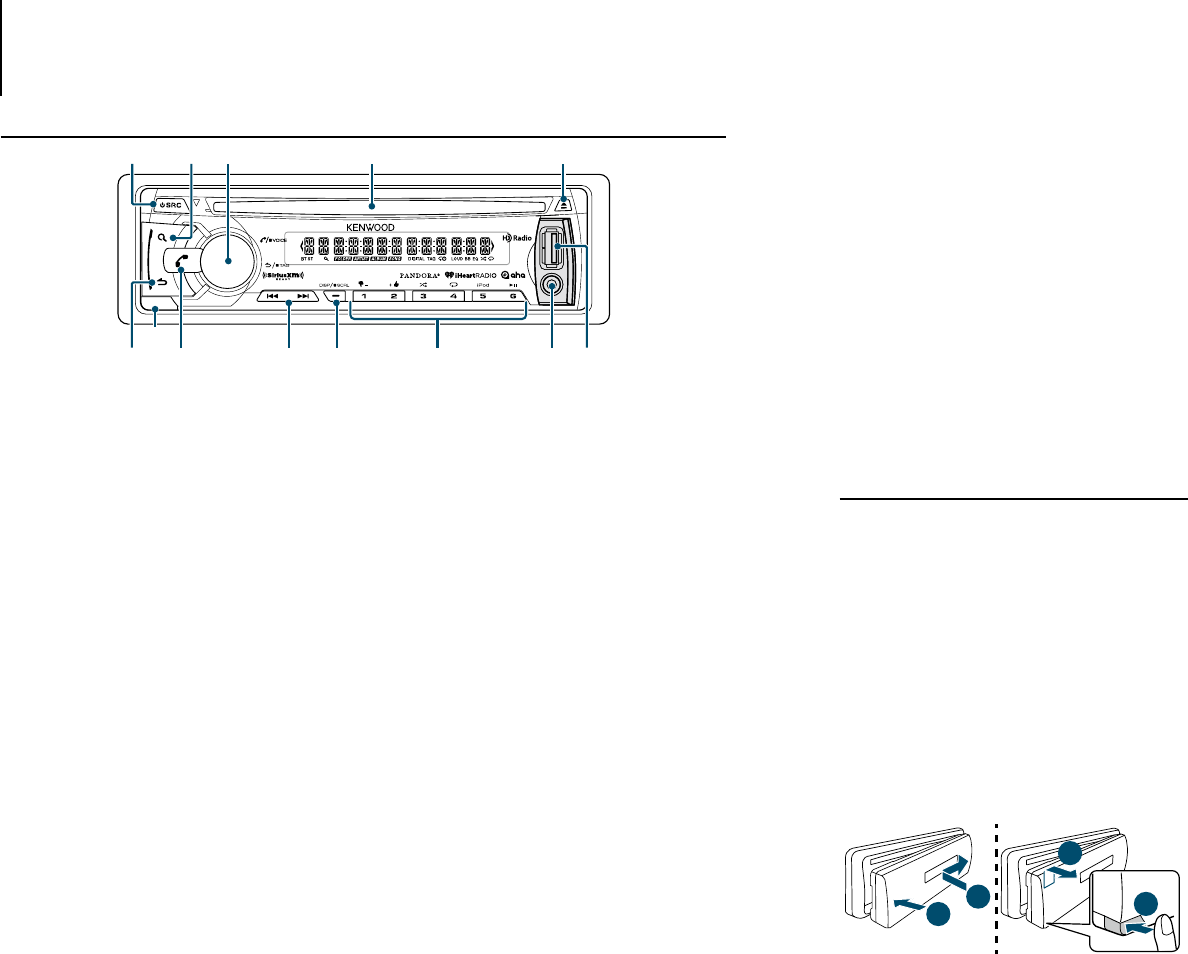
(1) [8SRC] button
Press the button to turn on the unit and select the
Source.
Press and hold the button to turn off the unit.
(2) [ 1 ] button
When listening to the radio, press the button to
select a band.
During CD, USB, iPod, Pandora, Aha or iHeartRadio
source playback, press the button to enter the
search mode.
(3) Volume knob
Turn the knob to adjust volume.
Press the knob to enter Function mode.
Turn and press the knob to select menu setting
item.
(4) Disc slot
(5) [G] button
Press the button to eject a disc.
(6) USB terminal
A USB device or an iPod can be connected.
(7) Auxiliary input
Portable audio device can be connected with the
mini-plug (3.5 mm ø).
(8) [1/ 5–] [2/ 4+] [3/ 9] [4/ /] [5/ iPod] [6/ L]
button
When listening to the radio, press the button to call
a preset station.
During CD/USB/iPod source playback, press the
button to perform the following operations:
- [1/ 5–] [2/ 4+] : Selects an audio file folder.
- [3/ 9] : Selects Random Play.
- [4/ /] : Selects Repeat Play.
- [5/ iPod] : Selects App & iPod Control Mode
- [6/ L] : Pauses or plays
(9) [DISP/ SCRL] button
Press the button to change display item.
Press and hold the button to scroll through texts
on the display.
Press and hold the button to enter the clock
adjustment mode directly while in clock display
screen.
(10) [E]/ [F] button
Press the button to select a station and song.
(11) [ Ú ] button
Press the button to enter Bluetooth mode.
Press the button to answer an incoming call.
Press and hold the button to start voice
recognition.
(12) Release button
Press the button to detach the faceplate.
(13) [ 6 ] button
In each of the selected modes, press the button to
return to the previous item.
When listening to HD Radio or SiriusXM source
playback, press and hold the button to retrieve tag
information.
The following indicator lights up when...
BT: Bluetooth cell-phone connection status.
ST: A stereo broadcast is received.
1: Indicates that the Music Search, Station Search,
Category Search, or Channel Search mode is
selected now.
FOLDER: Folder information is displayed in the Music
Search mode.
ARTIST: Artist information is displayed in the Music
Search mode.
ALBUM: Album information is displayed in the Music
Search mode.
SONG: The source is CD, USB, iPod, Pandora.
When displaying song information in the
Music Search mode.
DIGITAL: HD Radio digital broadcast is tuned in.
Blinks when changed to analog broadcast.
TAG: The song information can be registered.
+: Indicates that the Replay function is ON.
LOUD: “LOUDNESS” is set to “LV1” or “LV2”. See
<LOUDNESS> (page 27).
BB: “BASS BOOST” is set to “LV1”, “LV2” or “LV3”. See
<BASS BOOST> (page 27).
EQ: “PRESET EQ” is set to an EQ mode other than
“NATURAL”. See <PRESET EQ> (page 27).
9: Indicates that the Disc Random, Folder Random
or All Random function is ON.
/: Indicates that the Track Repeat, Folder Repeat or
File Repeat function is ON.
2.2 Preparation
How to read this manual
Operations explained mainly using buttons on the
faceplate.
• [ ] indicates the buttons on the panel.
•
XX
indicates the selected items.
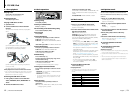
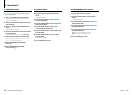
How to attach/detach the faceplate
• Do not expose the faceplate to direct sunlight,
excessive heat, or humidity. Also avoid places with
too much dust or the possibility of water splashing.
• Keep the faceplate in its casing while detached.
• The faceplate is a precision component of the unit
and can be damaged by shocks or jolts.
• To prevent deterioration, do not touch the terminals
of the unit and faceplate with your fingers.
2
1
2
1
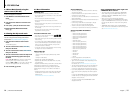
Canceling the demonstration mode
The display demonstration is always turned on unless
you cancel it.
When you turn on the power (or after you reset the
unit), the display shows:
“CANCEL DEMO” X “PRESS” X “VOLUME KNOB”
Press the volume knob.
“YES” is selected for the initial setting.
Press the volume knob again.
“DEMO OFF” appears.
- If no operation is done for about 15 seconds or
if you turn the volume knob to select “NO” in
step 2, “DEMO MODE” appears and the display
demonstration starts.
Setting the clock
Press [SCRL DISP] repeatedly to select the
clock.
Press and hold [SCRL DISP] to enter clock
adjustment mode.
Turn the volume knob to adjust the hour, then
press to enter minute adjustment.
Turn the volume knob to adjust the minute,
then press the knob.
- Press [E] / [F] to move between the hour
and minute adjustment.
Changing the initial settings
Refer to <3.3 Changing the initial settings> (page
11)


Find Your Products By Category
Please Login
