
3.9
Owner's of the Eureka Vacuum Cleaner LightSpeed gave it a score of 3.9 out of 5. Here's how the scores stacked up:


22
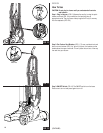
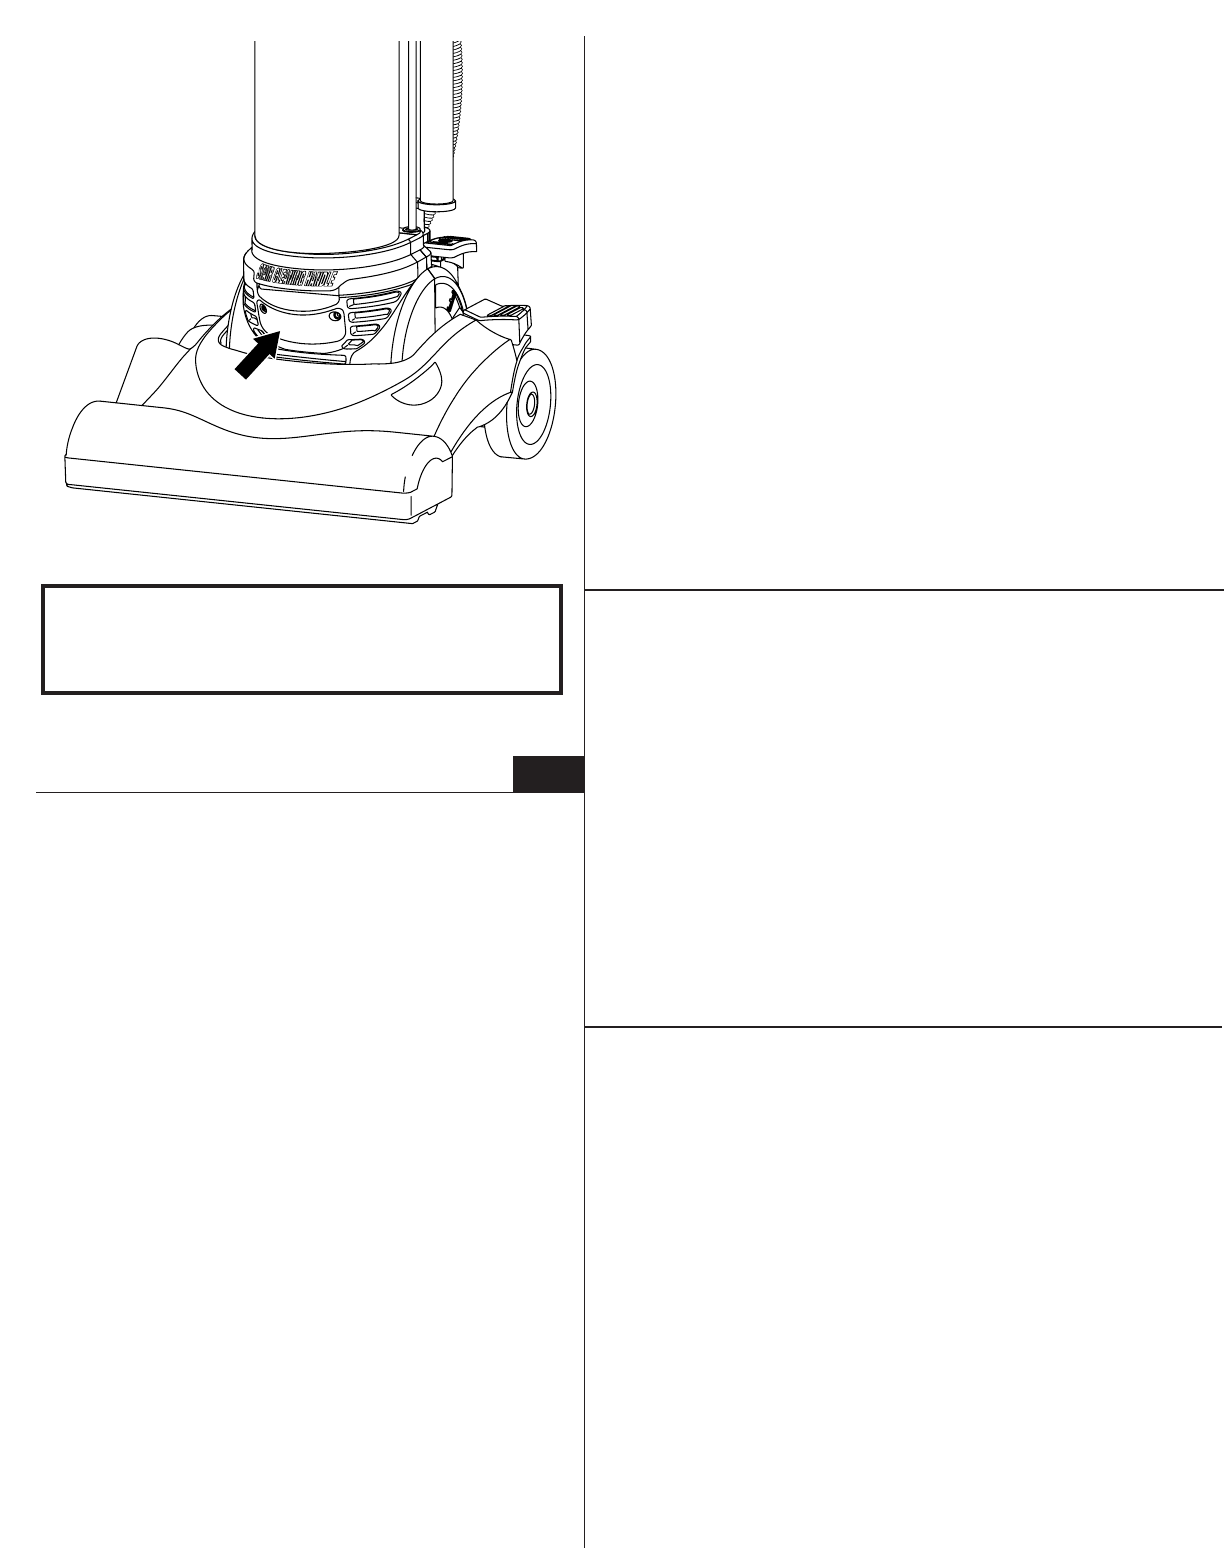
FIG. 21
ENGLISH
How To Maintain (CONTINUED)
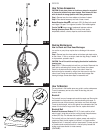
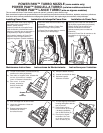
How To Change Light Bulb (FIG. 21)
To replace light bulb, please contact customer service – not available in
stores.
CAUTION: Turn off the power switch and unplug the electrical cord
before changing light bulb.
Step 1: Lower handle and remove two screws from lens cover.
Step 2: Pull lens cover from cleaner.
Step 3: Support socket with one hand and pull light bulb straight out to
release.
Step 4: Place new light bulb into socket;
push to secure.
Step 5: Make certain bulb will not touch lens cover.
Step 6: Replace lens cover.
Step 7: Secure lens cover with two screws.
Customer Assistance
USA 1-800-282-2886
Mexico 5670-6169
Canada 1-800-282-2886
FRANÇAIS
Entretien (CONTINUÉ)
Remplacement de l’ampoule (FIG. 21)
Pour remplacer l’ampoule, communiquez avec le service à la clientèle –
l’ampoule n’est pas vendue en magasin.
ATTENTION : Arrêtez l’aspirateur et débranchez le cordon électrique
avant de remplacer l’ampoule.
Étape 1. Abaissez le manche pour enlever les deux vis du cabochon.
Étape 2. Enlevez le cabochon.
Étape 3. Tenez la douille d’une main et tirez sur l’ampoule pour l’enlever.
Étape 4. Insérez l’ampoule dans le douille et poussez dessus pour la fixer
solidement.
Étape 5. L’ampoule ne doit pas entrer en contact avec le cabochon.
Étape 6. Replacez le cabochon.
Étape 7. Fixez cabochon avec les deux vis.
ESPAÑOL
Mantenimiento (CONTINUADO)
Cambio de la bombilla (FIG. 21)
Para reemplazar la bombilla, póngase en contacto con servicio al cliente
– no está disponible en las tiendas.
PRECAUCIÓN: Apague el interruptor y desenchufe el cordón eléctrico
antes de reemplazar la bombilla.
Paso 1. Baje la manija para retirar los dos tornillos de la tapa del lente.
Paso 2. Retire la tapa del lente de la aspiradora.
Paso 3. Sostenga el casquillo con una mano y tire de la bombilla derecho
hacia afuera para liberarla.
Paso 4. Coloque la nueva bombilla en el casquillo. Empuje para
asegurarla.
Paso 5. Asegúrese de que la bombilla no toque la tapa del lente.
Paso 6. Vuelva a colocar la tapa del lente.
Paso 7. Fije la tapa del lente usando dos tornillos.
Headlight is not available on all models.
L’éclairage frontal n’est pas disponible sur tous les modèles.
La luz frontal no se incluye en todos los modelos.


Find Your Products By Category
Please Login
