
4.4
Owner's of the Char-Broil Gas Grill C-21G0CB gave it a score of 4.4 out of 5. Here's how the scores stacked up:


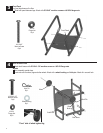
13
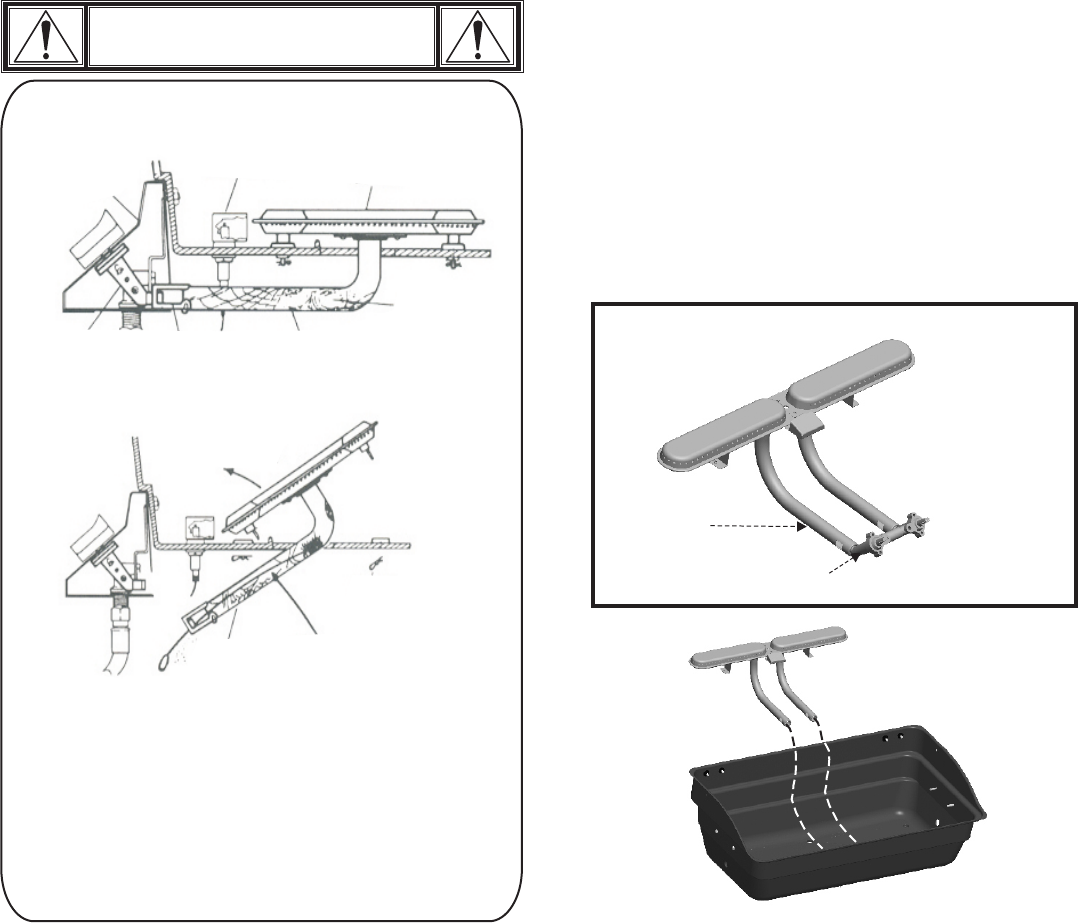
CAUTION
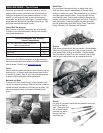
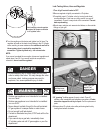
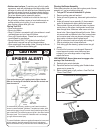
SPIDER ALERT!
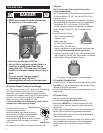
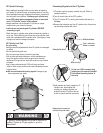
GAS COLLECTOR
BOX & IGNITOR
VALVE
CONTROL PANEL
BURNER
VENTURI
LIFT OUT
BURNER ASSEMBLY
AIR
SHUTTER
SPIDER WEBS
INSIDE VENTURI
SPIDER WEBS
INSIDE VENTURI
CLEAN OUT
VENTURI
REMOVE
BURNER
CLIPS
If you notice that your grill is getting hard to light or that the
flame isn’t as strong as it should be, take the time to check and
clean the venturi’s.
In some areas of the country, spiders or small insects have been
known to create “flashback” problems. The spiders spin webs, build
nests and lay eggs in the grill’s venturi tube(s) obstructing the flow of
gas to the burner. The backed-up gas can ignite in the venturi behind
the control panel. This is known as a flashback and it can damage
your grill and even cause injury.
To prevent flashbacks and ensure good performance the burner and
venturi assembly should be removed from the grill and cleaned
before use whenever the grill has been idle for an extended period.
• Stainless steel surfaces: To maintain your grill’s high quality
appearance, wash with mild detergent and warm soapy water
and wipe dry with a soft cloth after each use. Baked-on grease
deposits may require the use of an abrasive plastic cleaning
pad. Use only in direction of brushed finish to avoid damage.
Do not use abrasive pad on areas with graphics.
• Cooking surfaces: If a bristle brush is used to clean any of
the grill cooking surfaces, ensure no loose bristles remain on
cooking surfaces prior to grilling. It is not recommended to
clean cooking surfaces while grill is hot.
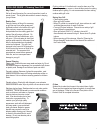
Storing Your Grill
• Clean cooking grates.
• Store in dry location.
• When LP cylinder is connected to grill, store outdoors in a well-
ventilated space and out of reach of children.
• Cover grill if stored outdoors. Choose from a variety of grill
covers offered by manufacturer.
• Store grill indoors ONLY if LP cylinder is turned off and
disconnected, removed from grill and stored outdoors.
• When removing grill from storage, follow “Cleaning the Burner
Assembly” instructions before starting grill.
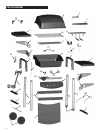
Cleaning the Burner Assembly
Follow these instructions to clean and/or replace parts of burner
assembly or if you have trouble igniting grill.
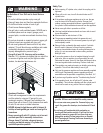
1. Turn gas OFF at control knobs and LP cylinder.
2. heat tent
3.
4.
5.
6.
7.
VERY IMPORTANT: Burner tubes must re-engage valve
openings. See illustration (A).
8.
electrode
9.
heat tent
grease cup
10.
Remove cooking grate and .
Under grill remove grease cup, disconnect ignitor wire from
burner.
Inside grill remove burner assembly (A), clean ceramic
portion of electrode with rubbing alcohol and a swab.
Clean outside of burner with soap and water. Lay burner
upside down on flat surface, insert garden hose to force
water through tubes. Make sure water comes out of all
burner holes. Open clogged holes with a thin wire. Shake
out excess water and examine holes. Due to normal wear
and corrosion some holes may become enlarged. If any
large cracks or holes are found replace burner.
If grill is to be stored, coat burner lightly with cooking oil.
Wrap in protective cover to keep insects out.
If not storing grill after cleaning, replace burner into grill
bottom.
Reattach ignitor wire to .
Reposition and cooking grate. Reattach clean
to grease clip.
Before cooking again on grill, perform a “Leak Test” and
“Burner Flame Check”.
A
Valve
Correct burner-to-valve engagement
Burner Tube
B
Check that the burners are not damaged. Because of
normal wear and corrosion some holes may have
enlarged. If you notice large cracks or large holes,
replace the burner.
11.


Find Your Products By Category
Please Login
