
0
Owner's of the Panasonic Answering Machine Panasonic Cordless Phone With Answering Machine gave it a score of 0 out of 5. Here's how the scores stacked up:

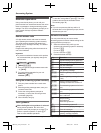
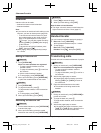


Wall mounting
T
he base unit can be mounted on a wall by
changing the wall mounting adaptor’s position.
Note:
R Make sure that the wall and the fixing method
are strong enough to support the weight of the
unit.
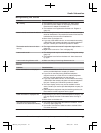
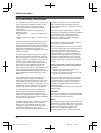
Base unit
1 T
o remove the wall mounting adaptor, push
down the release levers (A). Remove the
adaptor (B).
A
B
B
A
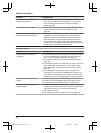
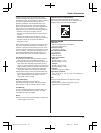
2 A
Turn the adaptor so that the words “UP
WALL” are facing up.
B Tuck the telephone line cord inside the wall
mounting adaptor.
C Connect the AC adaptor cord and
telephone line cord.
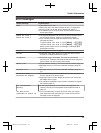
3
1
2
3 I
nsert the lower tabs of the adaptor into the
unit’s bottom slots (A), then insert by pushing
down the levers of the adaptor into the upper
slots(B).
R The words “UP WALL” should be facing up.
A
B
A
B
4 M
ount the unit on a wall then slide down to
secure in place.
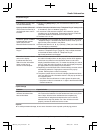
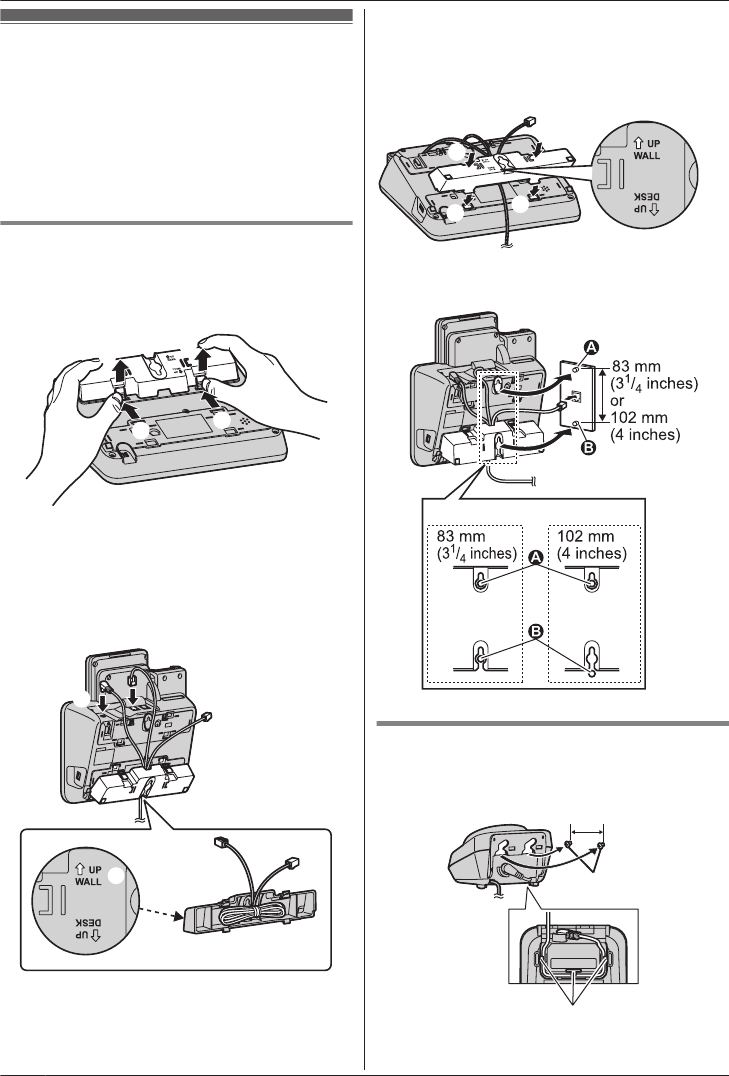
Wall phone plate
Charger
D
rive the screws (not supplied) into the wall.
25.4 mm
(1 inch)
Screws
Hooks
44
For assistance, please visit http://www.panasonic.com/help
Useful Information
TG9471(e)_1101_ver101.pdf 44 2012/11/01 9:55:25


Find Your Products By Category
Please Login
