
0
Owner's of the KitchenAid Gas Grill KBNS271TSS gave it a score of 0 out of 5. Here's how the scores stacked up:


35
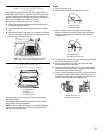
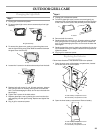
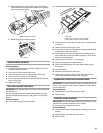
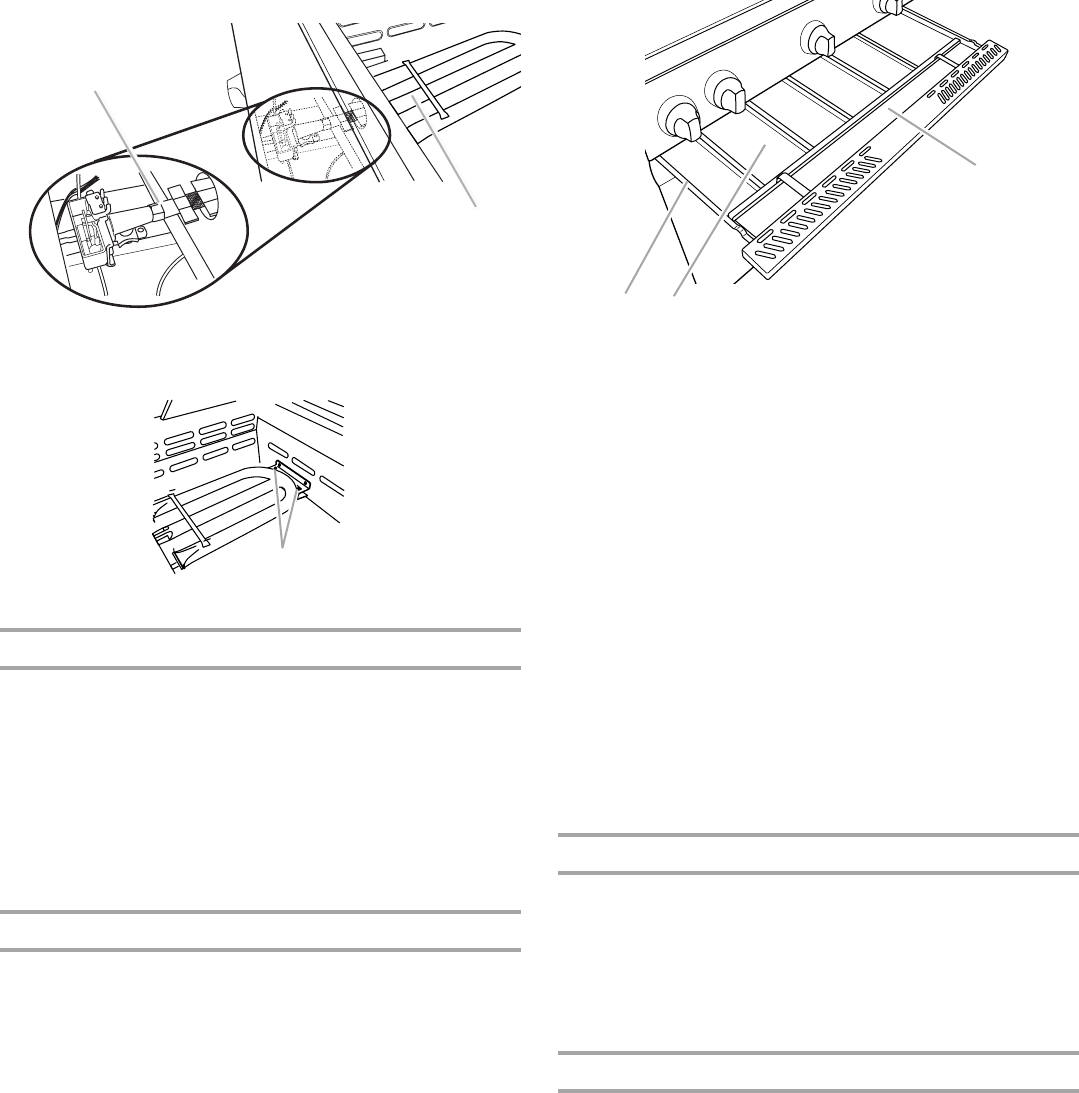
4. After inspecting the inside of gas burner for blockage,
reassemble burner by sliding the middle tube of the gas
burner over the gas orifice.
5. Reattach gas burner using 2 screws.
INFRARED SEAR BURNERS
Cleaning Method:
1. Light the infrared sear burner. See the “Lighting the Grill” in
the “Main Grill Use” section.
2. Turn knob to HI and close the grill hood.
3. Leave the burner on high for approximately 30 minutes.
4. Turn knob to OFF and let cool completely.
5. Remove grill grate and brush off ash particles from the sear
burner cover plate.
6. Replace grill grate.
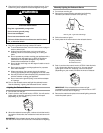
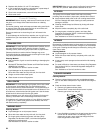
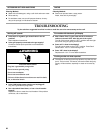
DRIP TRAY and DRIP TRAY PANS
IMPORTANT: The drip tray should only be removed when grill is
completely cool.
The drip tray pans (on some models) collect grease and food
particles that fall through the grill. Clean often to avoid grease
buildup.
Cleaning Method:
■ Pull out the drip tray to its stop position.
■ Grasp the handles of the long drip tray pan and lift to remove.
■ Grasp the end of a short drip tray pan, slide it forward and lift
to remove.
■ Repeat with the other drip tray pans.
■ Empty drip tray pans and dispose of contents properly. Wipe
excess grease with paper towels.
■ The drip tray pans can be washed with mild detergent and
warm water then rinsed and dried thoroughly, or they can be
cleaned in the dishwasher.
■ Remove drip tray and set on a flat surface.
■ Wipe excess grease with paper towels.
■ Wash with mild detergent and warm water. Rinse and dry
thoroughly.
■ Replace drip tray.
■ Replace drip tray pans into drip tray.
■ Close drip tray before using grill. The drip tray must be in
place and pushed all the way in when using grill.
KNOBS AND FLANGE AREA AROUND KNOBS
IMPORTANT: To avoid damage to knobs or to flange area around
knobs, do not use steel wool, abrasive cleaners, or oven cleaner.
Do not soak knobs.
Cleaning Method:
■ Mild detergent, a soft cloth and warm water.
■ Rinse and dry.
CONTROL PANEL GRAPHICS
IMPORTANT: To avoid damage to control panel graphics, do not
use steel wool, abrasive cleaners or oven cleaner.
Do not spray cleaner directly onto panel.
Cleaning Method:
■ Clean around the burner labels gently; scrubbing may remove
printing.
■ Mild detergent, soft cloth and warm water.
■ Rinse and dry.
A. Burner/orifice connection
A. 2 screws
A
B
A
A.Drip tray
B. Short drip tray pan (on some models)
C. Long drip tray pan (on some models)
A
B
C


Find Your Products By Category
Please Login
