
0
Owner's of the KitchenAid Gas Grill KBNS271TSS gave it a score of 0 out of 5. Here's how the scores stacked up:

27
Using Your Infrared Sear Burner
(on some models)
Infrared grilling produces intense heat which quickly sears the
meat. Searing locks in flavor and juices while allowing the outer
surface to absorb smoke and food aroma that is produced as
grease and drippings are vaporized by the burner. The result is a
crisp, flavorful outside with a tender, juicy inside.
■ Preheat the infrared sear burner for 5 minutes.
■ Ensure that meats are fully thawed and that all excess fat is
trimmed away prior to grilling.
■ Leave the burner set to HI when placing food on the grill to
sear.
■ Use the sear burner to sear meat 1 to 2 minutes on each side,
then move the meat to the main grill cooking surface to finish
grilling to the desired doneness.
Using Your Rotisserie
(optional accessory on some models)
For best cooking results, do not use main grill burners when
using the rotisserie.
The rotisserie system is designed to cook food from the rear
using intense, searing infrared heat.
NOTE: To avoid product damage when not using the rotisserie,
remove motor and store indoors. Remove spit rod and forks.
Store out of reach of children.
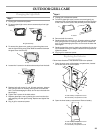
To Use:
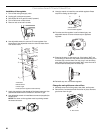
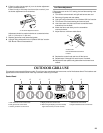
1. Remove warming shelf.
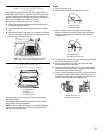
2. Install rotisserie mounting bracket using 2 screws.
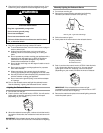
3. Mount rotisserie motor on the grill’s mounting bracket.
Position it securely into support bracket slots. Plug single-
prong plug of the 500 mAmp transformer assembly into
rotisserie motor.
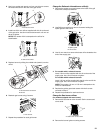
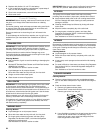
4. To load the spit rod, slide one of the rotisserie forks onto the
spit rod with prongs facing inward.
5. Push spit rod through the center of the food, then slide
second rotisserie fork into position.
6. Center the food and rotisserie forks on spit rod and tighten
wing nuts on the rotisserie forks. If necessary, secure loose
food portions with butcher’s string only.
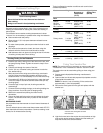
7. Once the food is positioned on spit rod, place pointed end of
rod through the hole in the left side of the grill and into the
rotisserie motor, then lower the notched end of the spit rod
onto the support bracket on the opposite side.
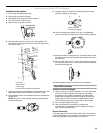
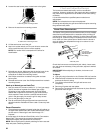
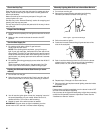
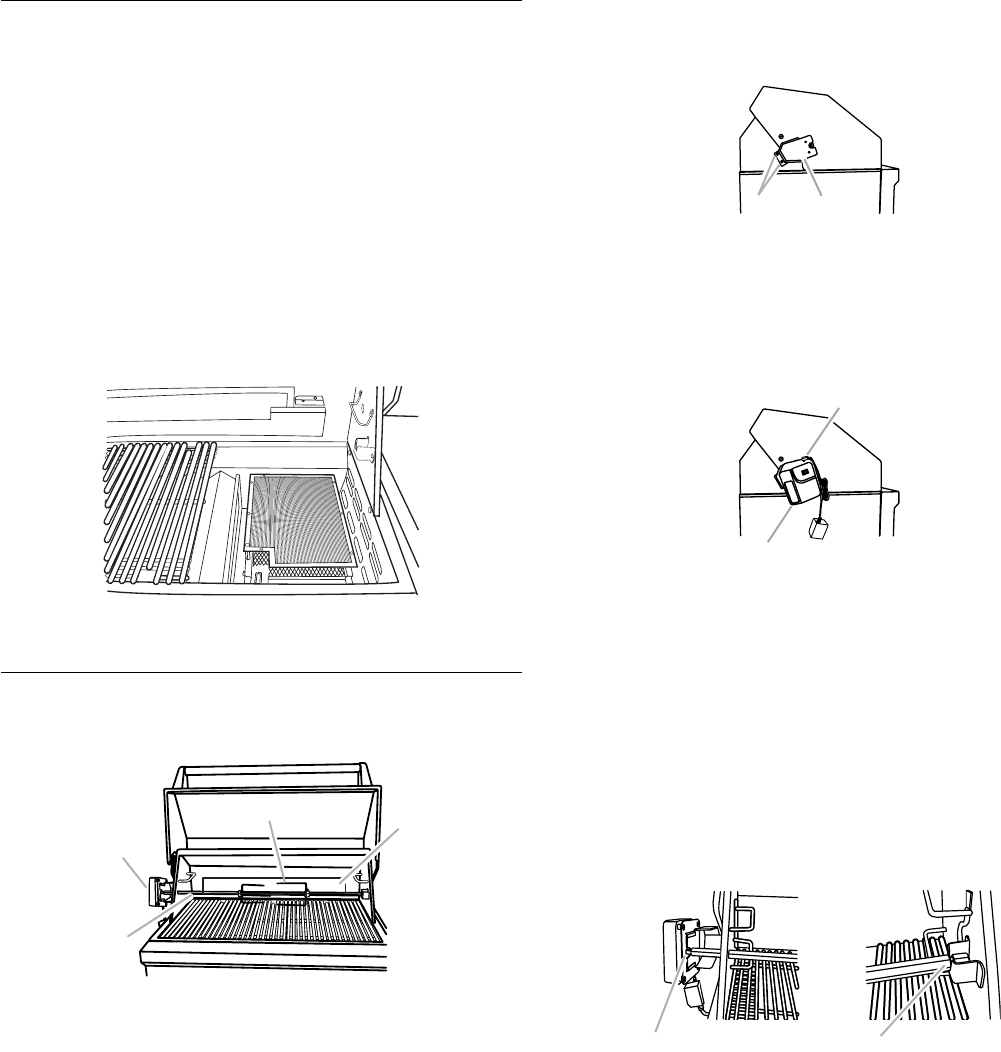
NOTE: View is shown with grates removed. Grates are
to be in place when using the infrared sear burner.
A. Rotisserie motor
B. Spit rod
C. Rotisserie fork
D.Rotisserie burner
A
B
C
D
A. 2 bracket screws
B.Rotisserie bracket
A. Rotisserie motor
B.Single-prong power cord
A.Pointed end of spit rod
B.Notched end of spit rod
A B
A
B
A
B


Find Your Products By Category
Please Login
