
0
Owner's of the JVC Camcorder JCV Everio High Definition Digital Camcorder gave it a score of 0 out of 5. Here's how the scores stacked up:

.
10
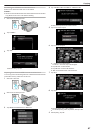
Press and hold the M button for 2 seconds or more to turn off this unit
and disconnect the USB cable.
Memo :
0
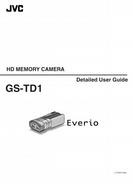
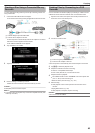
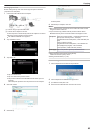
Images recorded in 3D mode and 2D mode are displayed on the index
screen separately. Press the 3D button to switch to the desired mode for
importing.
0
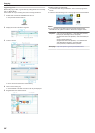
3D images recorded in “MP4(MVC)” format and “AVCHD” format are
displayed on the index screen separately.
Change the setting of 3D VIDEO REC FORMAT to the desired format for
importing.
“3D VIDEO REC FORMAT (3D mode only)” (A p. 104)
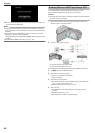
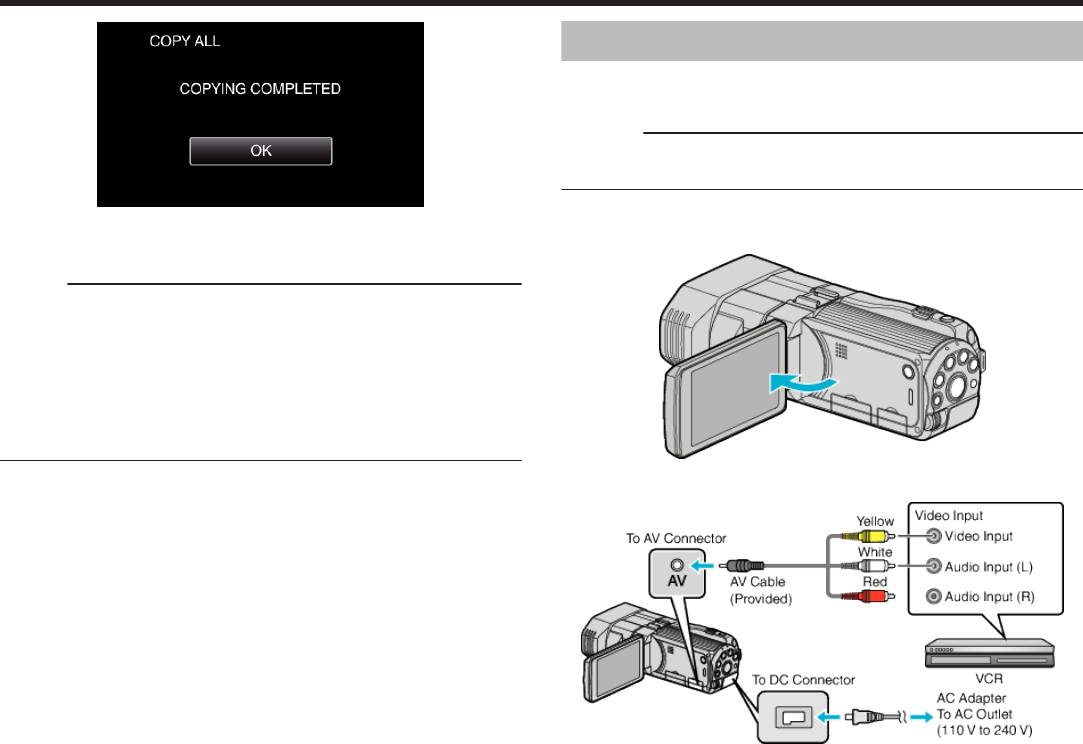
Dubbing Files to a VHS Tape Using a VCR
You can dub videos in standard quality by connecting to a VCR.
0
Refer also to the instruction manuals of the TV and VCR.
Caution :
0
3D images cannot be copied to a VHS tape. Images recorded in 3D mode
cannot be copied as 2D images.
1
Open the LCD monitor, then press and hold the power button for 2
seconds or more to turn off the power.
.
2
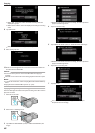
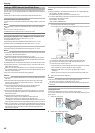
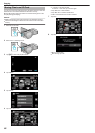
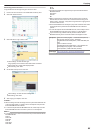
Connect to a VCR/DVD recorder.
.
A Connect using the provided AV cable.
B Connect the AC adapter to this unit.
0
This unit powers on automatically when the AC adapter is connected.
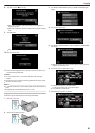
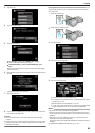
3
Tap q to select the playback mode.
4
Prepare the TV/VCR for recording.
0
Switch to a compatible external input.
0
Insert a video tape.
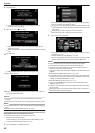
5
Prepare this unit for playback.
0
Set “VIDEO OUTPUT” in the “COMMON” menu to the aspect ratio
(“4:3” or “16:9”) of the connecting TV.
“VIDEO OUTPUT (2D mode only)” (A p. 127)
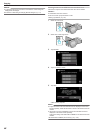
6
Start recording.
0
Start playback on this unit and press the record button on the
recorder.
“Playing Back Videos” (A p. 52)
0
After playback is complete, stop the recording.
Copying
88


Find Your Products By Category
Please Login
