
0
Owner's of the JVC Camcorder JCV Everio High Definition Digital Camcorder gave it a score of 0 out of 5. Here's how the scores stacked up:
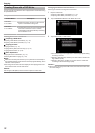
Preparing an External Blu-ray Drive
Memo :
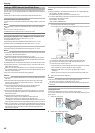
When connecting to the external Blu-ray drive, use a USB cable with Mini-
A (Male) – B (Male) connectors.
The USB cable provided with this unit cannot be used.
0
To use the USB cable provided with the external Blu-ray drive, purchase
the USB extension cable.
Mini-A (Male) – A (Female)
(Part number: QAM0852-001)
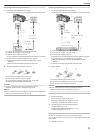
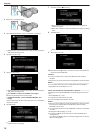
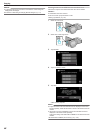
1
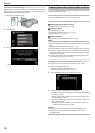
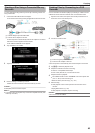
Connect the USB cable and the AC adapter.
0
Turn off the camcorder by pressing the M button for about 2 seconds.
.
A Connect the USB cable of the external Blu-ray drive to this unit.
B Connect the AC adapter of the external Blu-ray drive.
C Connect the AC adapter to this unit.
0
This unit powers on automatically when the AC adapter is connected.
0
This unit turns on and the “BACK-UP” menu appears.
0
While the USB cable is connected, the “BACK-UP” menu is
displayed.
0
Refer also to the instruction manual of the external Blu-ray drive.
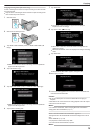
2
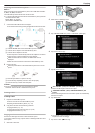
Insert a new disc.
0
Press the power button on the external Blu-ray drive to turn on the
power.
.
A Press the eject button to open the disc tray.
B Pull out the tray completely and load a new disc properly.
C Push the disc tray in until it clicks into place.
Caution :
0
Be sure to turn off the power when connecting the devices.
Otherwise, electric shocks or malfunctions may occur.
Creating a Disc
Creating a Disc
1
Prepare an external Blu-ray drive.
0
Insert a new disc into the external Blu-ray drive.
“Preparing an External Blu-ray Drive” (A p. 79)
2
Copy files to the disc with the following methods.
“Copying All Files” (A p. 79)
“Copying Files by Date (2D mode only)” (A p. 80)
“Copying Selected Files” (A p. 81)
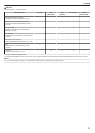
Copying All Files
All videos or still images recorded on this unit will be copied.
You can also select and copy only the videos or still images that have never
been copied.
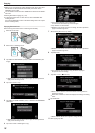
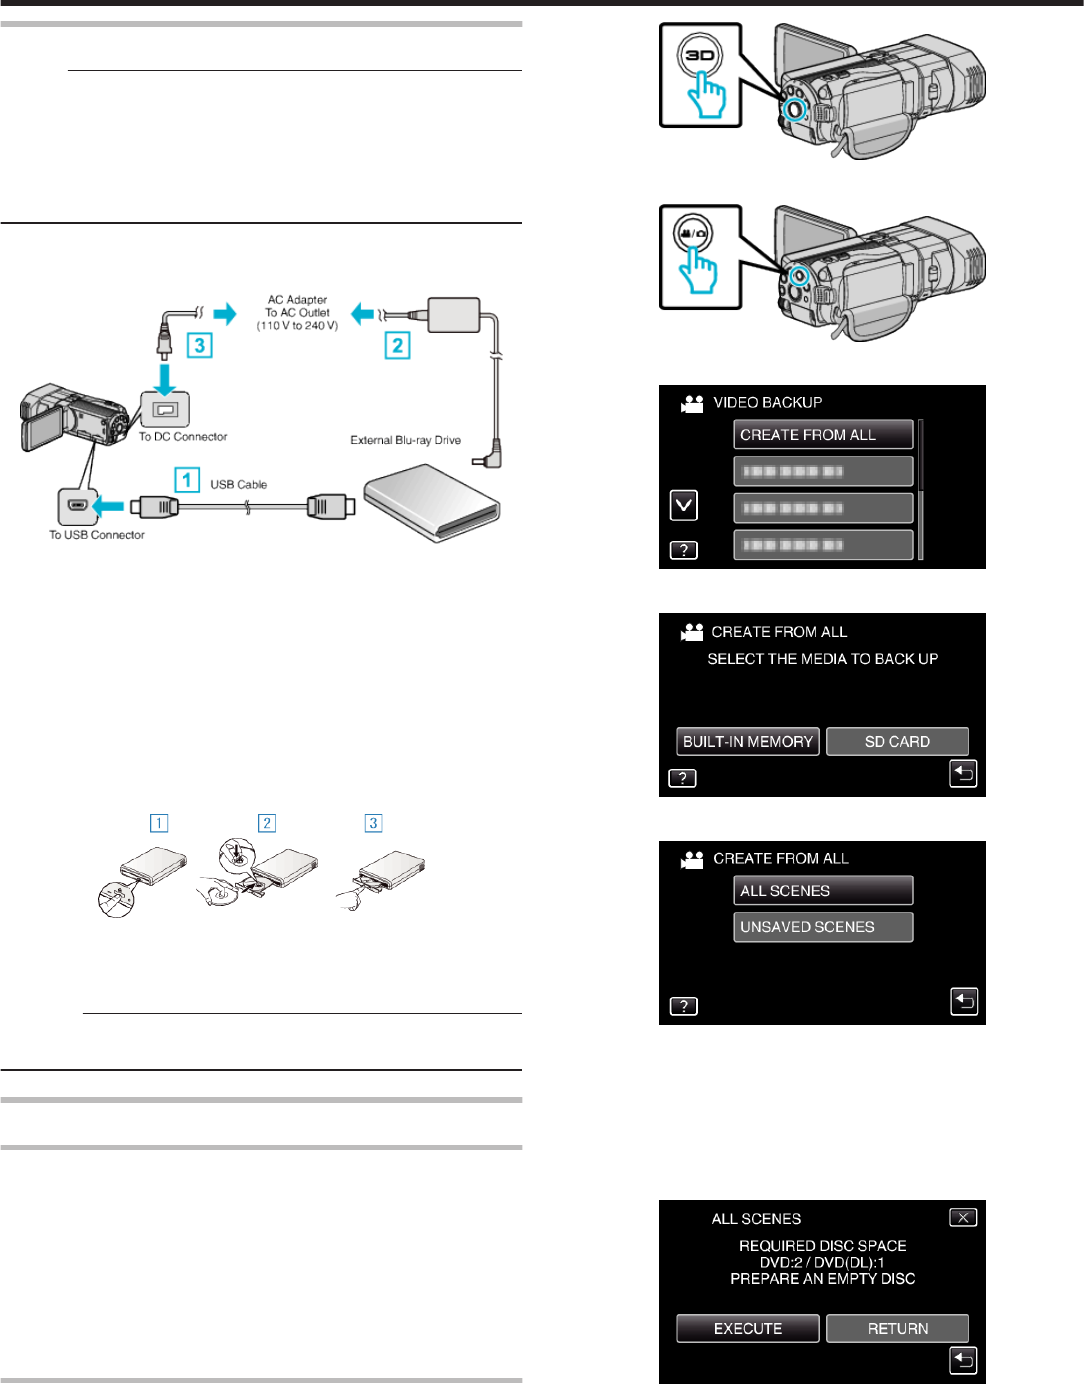
1
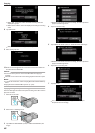
Select 3D or 2D mode.
.
2
Select video or still image mode.
.
3
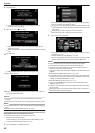
Tap “CREATE FROM ALL” (video) or “SAVE ALL” (still image).
.
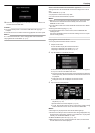
4
Tap on the media to copy.
.
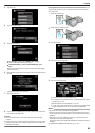
5
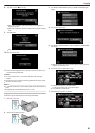
Tap the desired method.
.
0
“ALL SCENES” (video)/“ALL IMAGES” (still image):
All videos or still images in this unit are copied.
0
“UNSAVED SCENES” (video)/“UNSAVED IMAGES” (still
image):
Videos or still images that have never been copied are automatically
selected and copied.
6
Tap “EXECUTE”.
.
0
The number of discs required to copy the files is displayed.
Prepare the discs accordingly.
7
Tap “YES” or “NO”. (A mode only)
Copying
79


Find Your Products By Category
Please Login
