
0
Owner's of the First Alert Weather Radio Public Alert Radio gave it a score of 0 out of 5. Here's how the scores stacked up:


11
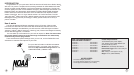
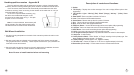
Battery Installation
The WX-150 uses 4 AA batteries for back-up power. It can run on non-rechargeable
alkaline, or rechargeable Nickel Cadmium (Ni-Cad) or Nickel Metal Hydride (NiMH)
batteries. When the radio is operating on battery power, the green READY light will blink.
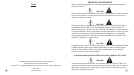
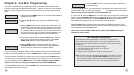
Use the slide switch located inside the battery compartment to select the battery type.
(See Fig. 1) When alkaline batteries are installed, push the switch down to select
“ALK” When using rechargeable batteries, push the switch up to select “CHG”. It is
recommended that rechargeable batteries be replaced every three years.
DO NOT CHARGE ALKALINE BATTERIES!
Always set the battery select switch to “ALK” before installing alkaline batteries.
Using the “CHG” setting with alkaline batteries may
cause batteries to leak and present a a re hazard.
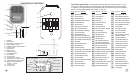
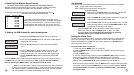
To install or replace the batteries:
- Turn the unit upside down. Locate the battery
compartment door tab (Fig. 2), press down on the door
tab and lift the cover up to open
- Insert the batteries into the battery compartment.
Be sure to follow the polarity markings. (Fig. 3)
- Set the battery charging switch to ALK for non-
rechargeable alkaline batteries. Set it to CHG for NiCad
rechargable batteries.
- Replace the cover.
NOTES: Rechargeable batteries must be charged for
at least 24 hours before they are ready. Rechargeable
batteries provide approximately 15 to 20 hours of
operation time. Non-rechargeable alkaline batteries will
provide over 50 hours of operation time. To maintain
maximum backup time, do not disconnect AC power
supply from the unit while in use. Remove the batteries
when the unit is not used for a prolonged period of time.
22
Upon selection of the warning level, press the SAVE button to save and exit to the
ADD ALERTS prompt of the main menu list. To add another alert at this time, press
the NEXT button to enter the ADD ALERTS menu and repeat steps 3-5. To return to
normal operation press the MENU button. Note: if you exit the ADD ALERTS menu by
pressing the MENU button, your changes will not be saved.
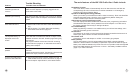
Setting the Siren Mode
The WX-150 allows you to block the siren from sounding on some warnings that are not
relevant to your area. For example, a ood warning that may be issued in your county
may not affect your location. You may not want the siren to sound for a ood warning
alert. Note: Some alerts, such as Tornado Warning, are not blockable.
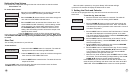
ALERT MODE
SIREN MODE
Administrative Mess
OFF
To set the Siren Mode :
1. Press and hold the MENU button for 3 seconds. The radio will
display the main menu list showing ALERT MODE.
2. Press the UP() button 3 times to scroll up through the main menu
list to the SIREN MODE menu.
3. Press the NEXT button to enter the Siren Mode menu. The words
ADMINISTRATIVE MESSAGE will scroll across the top of the
screen. This is the rst alert on the list of alerts that NOAA can
broadcast. You have the option to turn the siren OFF to block this
alert or ON to receive it . Use the PREV and NEXT buttons to
make your selection.
4. After setting the Siren Mode for this alert, use the UP/DOWN (/)
buttons to scroll through the list of alerts, following the same
sequence to set the SIren Mode for each alert desired.
Upon selecting of the Siren Mode for the desired alerts, press the SAVE button to save
and exit to the SIREN MODE prompt of the main menu list. To set the SIREN MODE for
additional alerts at this time, press the NEXT button to enter the SIREN MODE menu and
repeat steps 3 and 4. To return to normal operation press the MENU button.
Note: if you exit the ADD ALERTS menu by pressing the MENU button, your
changes will not be saved.
Fig.1 Fig. 2 Fig. 3


Find Your Products By Category
Please Login
