
0
Owner's of the Denon Car Stereo System RCD-N7 gave it a score of 0 out of 5. Here's how the scores stacked up:


29
Getting Started Connections
Basic Operations Advanced OperationsAdvanced Operations TroubleshootingExplanation termsInformation Specifi cations Index
ENGLISH
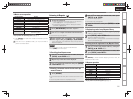
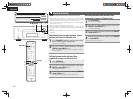
Adjusting the clock automatically [Clock]
You can automatically adjust the clock of this unit using the Internet.
To use this function, the unit must be connected to the Internet.
Setting the Time Zone
Use the following procedure to select your local standard time (time
zone).
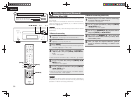
1
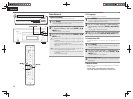
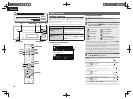
Press [MENU].
Turns on the Menu settings mode and the Menu appears on
the display. (vpage27 “Menu map”)
2
Use ui to select “Clock” – “Auto Adjust” – “Time
Zone”, then press [ENTER], <1/3
ENTER
> or p.
“Time Zone” menu appears.
3
Use ui to select your time zone, then press
[ENTER], <1/3
ENTER
> or p.
The setting is entered.
Setting the Summer Time
Use the following procedure to set Summer time if the Summer time
system is used in your country.
1
Press [MENU].
Turns on the Menu settings mode and the Menu appears on
the display. (vpage27 “Menu map”)
2
Use ui to select “Clock” – “Auto Adjust” –
“Summer Time”, then press [ENTER], <1/3
ENTER
> or p.
“Summer Time” menu appears.
3
Use ui to select “Off (0H)” or “On (+1H)”, then
press [ENTER], <1/3
ENTER
> or p.
The setting is entered.
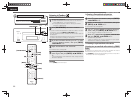
Auto Adjust
Use the following procedure to automatically adjust the clock.
1
Press [MENU].
Turns on the Menu settings mode and the Menu appears on
the display. (vpage27 “Menu map”)
2
Use ui to select “Clock” – “Auto Adjust” –
“Adjust Now”, then press [ENTER], <1/3
ENTER
>
or p.
The operation to receive the current time starts.
• The current time is displayed for several seconds when it is received
successfully.
• If the current time is not received successfully, “Connection Failed”
appears.
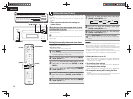
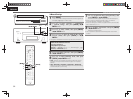
Setting the current time (Manual Adjust)
(12-Hour Display)
1
Press [MENU].
Turns on the Menu settings mode and the Menu appears on the
display. (vpage27 “Menu map”)
2
Use ui to select “Clock” – “Manual Adjust”, then
press [ENTER], <1/3
ENTER
> or p.
3
Use ui to set the “hours”.
4
Press [ENTER], <1/3
ENTER
> or p.
5
Use ui to set the “minutes”.
6
Press [ENTER], <1/3
ENTER
> or p.
The current time is set.
n Checking the current time when the power is on
Press [CLOCK].
Press once more and the display returns to its original condition.
n Checking the current time when the power is
set to standby
Press [CLOCK].
The current time is displayed for 30 seconds.
NOTE
The time cannot be set when in the standby mode. Turn on the power
fi rst.


Find Your Products By Category
Please Login
