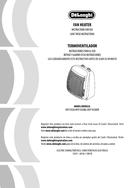

0
Owner's of the DeLonghi Fan Fan Heater gave it a score of 0 out of 5. Here's how the scores stacked up:

4
Your product is equipped with a polarized alternating cur-
rent line plug (a plug having one blade wider than the
other). This plug will fit into the power outlet only one
way. This is a safety feature. If you are unable to insert the
plug fully into the outlet, try reversing the plug. If the plug
should still fail to fit, contact your electrician to replace
your obsolete outlet. Do not defeat the safety purpose of
the polarized plug.
CAUTION
- Always use the heater in an upright position.
- Do not use the heater to dry your laundry. Never obstruct
the intake and outlet grilles (danger of overheating).
- The electrical cord must be replaced only by authorized
personnel.
ELECTRIC POWER CONNECTION
The fan heater must be connected to a properly polarized A/C
110/120 V household outlet in perfect working condition. Keep
loose clothing or bedding, furniture and flammable material
away from the wall outlet where the heater is plugged in.
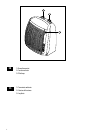
INSTALLATION
The fan heater can be easily positioned on any horizontal sup-
port surface in an upright position.
OPERATION
Make sure the appliance is off before plugging into the mains.
1. Plug the appliance into the mains.
2. Turn the thermostat dial to maximum.
3. Summer mode (fan only): turn the function selector
to the position (the pilot lamp will light on).
4. Low power operation: turn the function selector
to position “1” (the pilot lamp will light on).
5. High power operation: turn the function selector
to position “2” (the pilot lamp will light on).
Setting the thermostat:
Position the thermostat on maximum. When the room
has reached the required temperature, turn the thermostat dial
slowly anticlockwise until you hear a click; the fan go off
(the pilot lamp stays on). The thermostat will then keep room
temperature at the selected level automatically.
Anti-freeze function
With the function selector in position “2” and the thermo-
stat dial in position . The appliance maintains room
temperature at about 41°F (5°C), preventing freezing with
minimal energy consumption.
Switching the appliance off: turn the function selector
to the “o” position and the thermostat dial to the
position, then remove the plug from the electrical outlet.
MAINTENANCE AND SERVICE
Always remove the plug from the power socket and allow the
heater to cool. After the heater has cooled, clean it with a soft
damp cloth, do not use detergents or abrasives. Periodically
clean the air intake and outlet grilles during the period in
which the heater is in use with a vacuum cleaner. Should the
heater not be in use over a certain length of time, wrap the
cable and store it in a dry place. This appliance has been built
to provide many years of trouble free service. In case of mal-
function, do not try to repair the heater yourself: it may result
in fire hazard or electric shock. Call the nearest Service Center.
ventilate the room thoroughly to eliminate the “new” smell released by the appliance. It is completely nor-
mal for the appliance to emit “creaking” sounds the first time it is run.
24. During use check frequently to determine if the plug, outlet, or faceplate is hot.
25. CAUTION: To prevent electric shock, make sure the wide prong of the plug is inserted in the
wide slot of the outlet.
26. CAU
TION: Risk of fire. Do not open. No user serviceable parts inside.
SAVE THESE INSTRUCTIONS
For Household use only
1
2
1
2
1
2
1
2
1
2
1
2
1
2
1
2
1
2
1
2


Find Your Products By Category
Please Login
