
0
Owner's of the Brother Photo Scanner Brother Photo Scanner gave it a score of 0 out of 5. Here's how the scores stacked up:

Troubleshooting
205
9
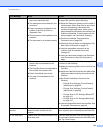
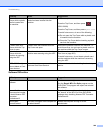
The scanned image is
missing.
The Document Guides are not
adjusted to fit the width of the
document.
The Auto Deskew feature was set to
On when the document was
scanned.
The settings are not suitable for your
document. For example, a Legal-
size document was fed when Letter
was selected as document size.
The card was loaded horizontally.
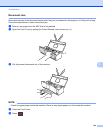
Adjust the Document Guides to fit the width of
the document. When Scan Size is set to Auto
and you are scanning a document that contains
multiple page sizes, insert narrow pages straight
and as close to the center of the machine as
possible. If the document does not stay straight
while feeding, use Continuous Scanning.
Set Auto Deskew to Off.
Make sure the document size settings are
suitable for your document.
Load the card vertically.
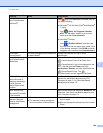
The scanned image is
skewed.
The Document Guides are not
adjusted to fit the width of the
document.
The Auto Deskew feature was set to
Off when the document was
scanned.
Adjust the Document Guides to fit the width of
the document. When Scan Size is set to Auto
and you are scanning a document that contains
multiple page sizes, insert narrow pages straight
and as close to the center of the machine as
possible. If the document does not stay straight
while feeding, use Continuous Scanning.
Set Auto Deskew to On.
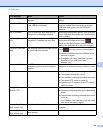
The scan speed is too
slow.
The resolution is not suitable for your
document.
Decrease the scanner resolution.
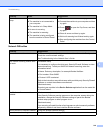
The document was not
fed.
Paper dust has accumulated on the
surface of the Pick-up Roller or
Separation Pad.
Too many documents are loaded in
the document feeder at a time.
There are foreign objects in the
document feeder.
Your document is too thin or too
thick.
Remote Setup is in process.
Paper ejection has paused.
The Separation Pad Cover is not
properly closed.
Clean the Separation Pad and Pick-up Roller.
To clean the Separation pad, see Replace the
Separation Pad on page 184 to refer how to pull
the Separation Pad out from the machine, clean
the rubber side of the Separation Pad with a soft
lint-free cloth moistened with water, and then
attach the Separation Pad in the machine. To
clean the Pick-up Roller, see Clean the Scanner
on page 176.
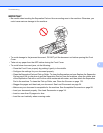
Make sure your document is acceptable for the
machine. See Acceptable Documents
on page 28.
Remove any foreign objects or ripped paper
from the document feeder.
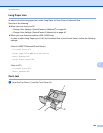
Cancel Remote Setup.
Finish ejecting the paper.
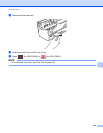
Securely close the Separation Pad Cover until
the hooks fit into the Front Cover.
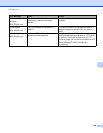
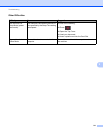
Difficulty Cause Suggestions


Find Your Products By Category
Please Login
