
0
Owner's of the Brother Photo Scanner Brother Photo Scanner gave it a score of 0 out of 5. Here's how the scores stacked up:


General Information
3
1
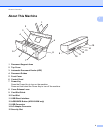
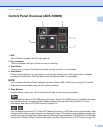
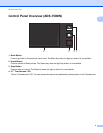
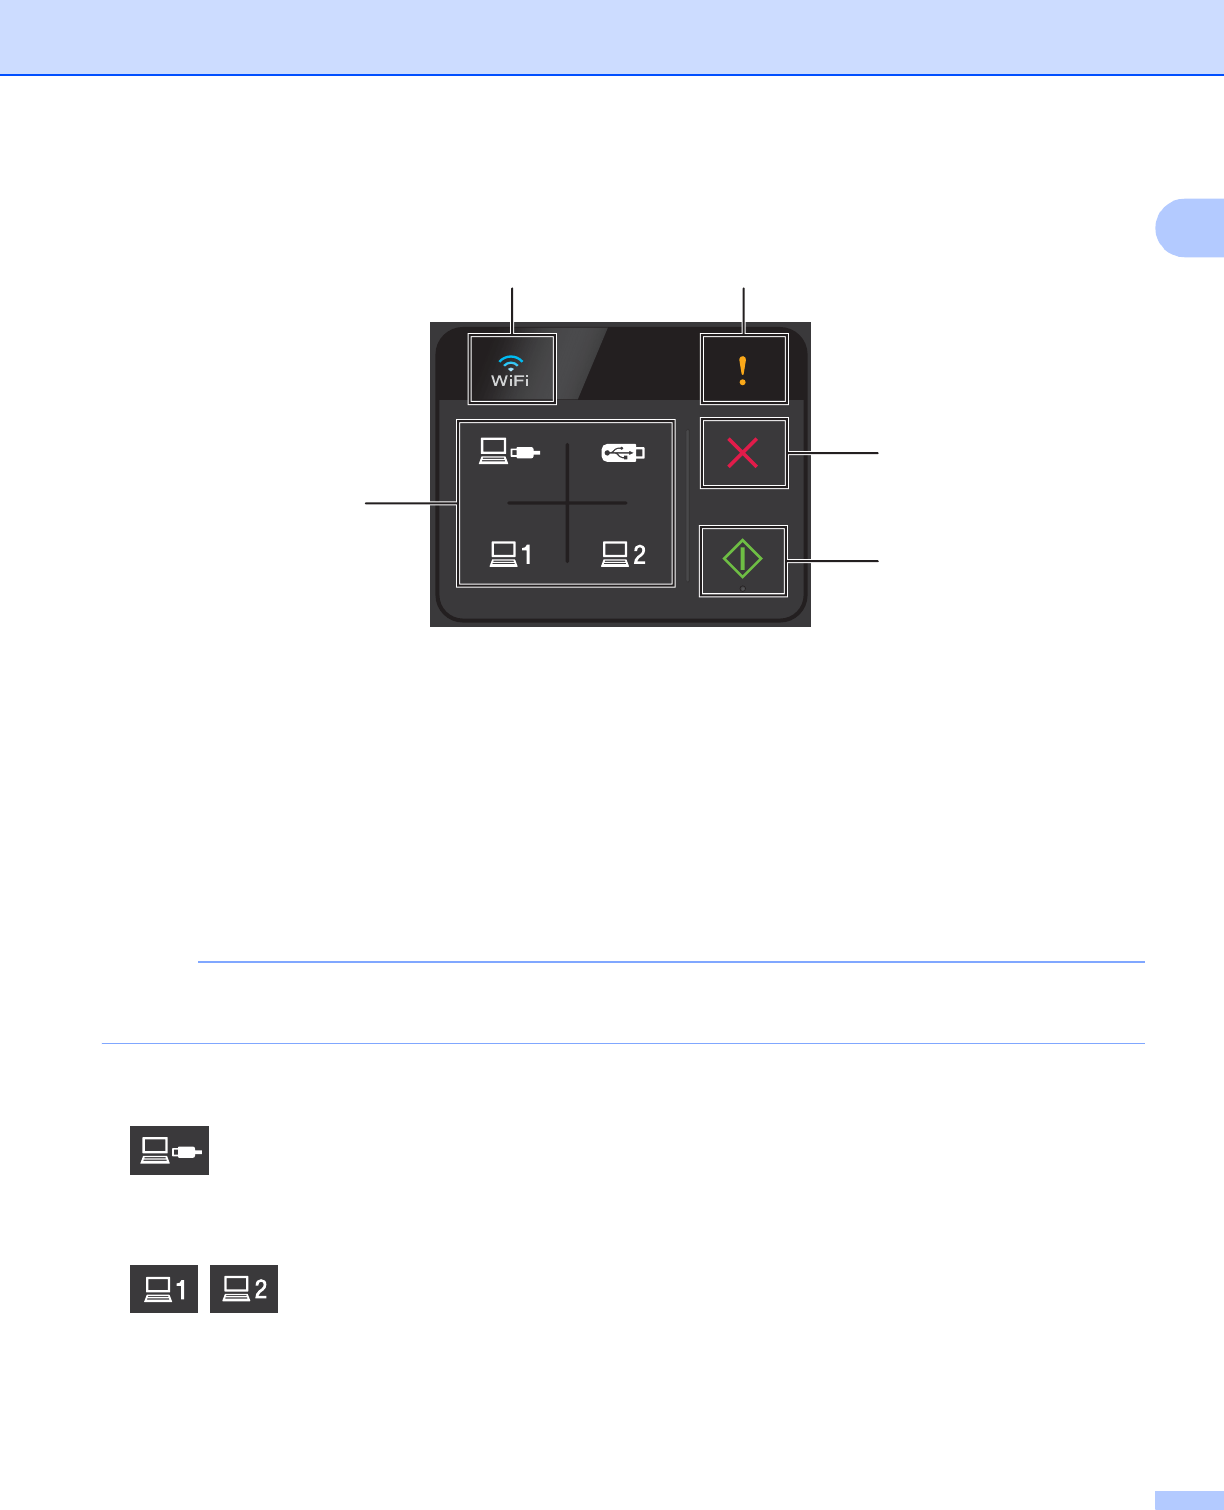
Control Panel Overview (ADS-1000W) 1
1WiFi
When WLAN is enabled, the WiFi light lights up.
2 Error Indicator
The Error Indicator will light up when an error is occurring.
3 Stop Button
Press to stop or cancel. The Stop button does not light up when it is unavailable.
4Start Button
Press to start scanning. You must select a scan type by pressing one of the Scan buttons (5) before
pressing the Start button. The Start button does not light up when it is unavailable.
NOTE
If you configure the Scan Priority settings (see Scan Priority (ADS-1000W only) on page 217) and the
Scan buttons are available, they will blink without pressing.
5 Scan Buttons
Press to select a scan type. The Scan buttons will light up when they are available.
Press to select the Scan to PC (USB Connect) function. Scan to PC (USB Connect) is available only when
the machine was set up using the USB interface method (see the Quick Setup Guide). For more
information, see Scan to PC (USB Connect) on page 130.
You can assign the Scan to FTP, Scan to PC (Network Connect), or WS Scan function to these keys. After
configuring the settings, press to select your assigned function. These buttons are available only when the
machine was set up using the wireless network method with the installation DVD-ROM and a USB cable
(see the Quick Setup Guide). For more information, see Scan Documents to an FTP Server on page 116,
4
5
2
1
3


Find Your Products By Category
Please Login
