
0
Owner's of the Brother Photo Scanner Brother Photo Scanner gave it a score of 0 out of 5. Here's how the scores stacked up:


Scan Using the Control Panel
138
6
(ADS-1500W)
NOTE
Certain characters in the messages displayed on the LCD may be replaced with spaces when the
language settings of your OS and your Brother machine are different.
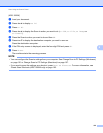
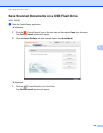
a Load your document.
b Press d or c to display to PC.
c Press to PC.
d Press d or c to display WS Scan.
e Press WS Scan and then OK.
f Press the type of scan you want to do.
g Press a or b to display the destination computer you want to send to.
Press the destination computer.
h Press Start.
The machine starts scanning process.
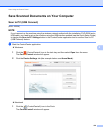
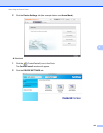
Configuring Settings for Scanning 6
If the LCD or LED indications show Out of Memory, decrease the Paper size setting or the Resolution
setting.
a (Windows Vista
®
)
Click the button, Control Panel, Hardware and Sound, then Scanners and Cameras.
(Windows
®
7)
Click the button, Control Panel, Hardware and Sound, then Devices and Printers.
(Windows
®
8)
Move your mouse to the lower right corner of your desktop. When the menu bar appears, click Settings,
and then click Control Panel. In the Hardware and Sound group, click View devices and printers.
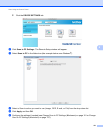
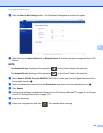
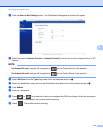
b Click your machine, and then click the Scan Profiles button.
The Scan Profiles dialog box will appear.
c Choose the scan profile you want to use. Make sure the scanner selected in Scanner is a Brother
machine that supports Web Services for scanning.
Click Set as Default.
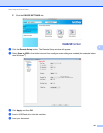
d Click Edit. The Edit Default Profile dialog box will appear.
e Choose the Source, Paper size, Color format, File type, Resolution, Brightness and Contrast
settings.


Find Your Products By Category
Please Login
