
4.8
Owner's of the Bosch Appliances Washer/Dryer Bosch Appliances Washer/Dryer gave it a score of 4.8 out of 5. Here's how the scores stacked up:

11
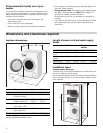
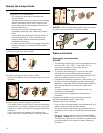
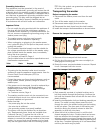
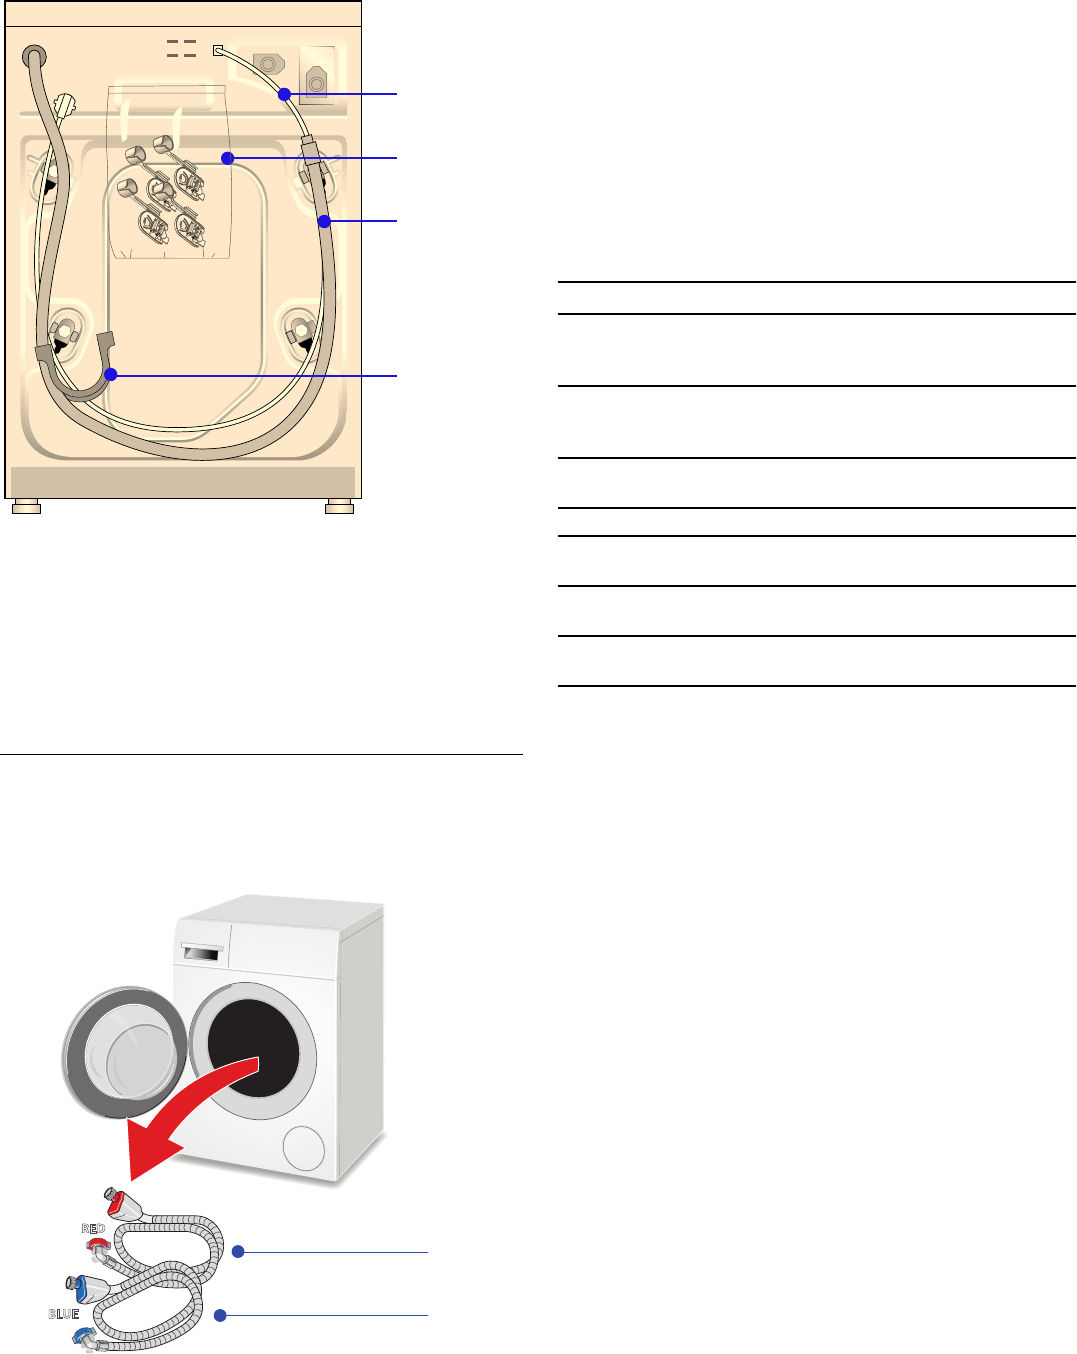
Parts provided with your washer
Back side of the washing mashine
Washer drum contents
2 water supply hoses are shipped in the washer drum.
Be sure to remove each of these items from the drum
before using the washer.
NOTICE: If any parts are missing please notify your
dealer immediately.
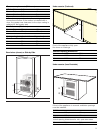
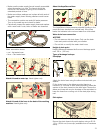
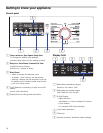
Set up on a pedestal with drawer
Pedestal item number: WMZ 20490
Mount washer on the pedestal according to the
instructions in the installation kit.
Installation checklist
Review the following list and check off each step as it is
completed during installation.
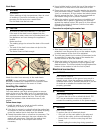
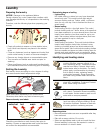
Importance of installing on a solid, level
floor
Your new Bosch washing machine utilizes high spin
speeds to achieve superior water removal from your
laundry resulting in reduced drying time. It is important to
install your washing machine on a floor that will provide
firm support. This prevents the washer from experiencing
excess vibration during spinning that could cause the
washer to move or be noisy.
The installation surface must be solid and level in both
directions. Avoid installing your washer on soft surfaces
such as floors with carpet or foam backed covering
material.
If installing the washer on a wooden floor, observe the
following:
▯ install the washer in a corner for better support if
possible.
▯ if necessary, reinforce the floor by screwing a water
resistant wooden board to the floor (minimum of
1.18 in./30 mm thick).
▯ secure the front feet of the washing machine with
holding brackets. A set of holding brackets can be
obtained from a specialist store or from Customer
Service (part number WMZ 2200).
(
Power cord with plug
0
Literature pack; contents:
▯ User manual
▯ Warranty
▯ Covers with hose holders
8
Drain hose
@
Elbow to form the hose to fit the drain pipe
#
+
3
H
Hot water connection
P
Cold water connection
è
Installation Step Page
If installing to a pedestal (base), com-
plete the base installation before
removing the transportation bolts
12
Completely remove all four shipping
bolts keeping the bolt and bushing
assemblies intact
12
Connect the water supply hose and
drain hose
12
Connect the electrical power 14
Slide the washing machine into its final
location
Level the washing machine (as low as
possible)
14
Before washing laundry, run a mainte-
nance cycle
22


Find Your Products By Category
Please Login
